Avrio is a data mesh solution that enables the development of a true data-driven community by enabling users to easily create, maintain, and share data. Avrio is available on Amazon Web Services (AWS) marketplace in the form of a pay-as-you-go subscription.
Avrio provides an easy subscription aimed at organizations to get started quickly and can be deployed as an Elastic Container Services (ECS)
This quick start guide will give you an overview of how to quickly get started with Avrio on AWS.
Pre-requisites
AWS Account with Private/Public certificate enrolled/issued in AWS Certificate Manager
AWS Cognito
AWS Athena - default profile needs to be created
S3 bucket where you are storing the data to process via Glue and QuickSight
Access to QuickSight for the S3 bucket using IAM role
Route53 Internal Zone created for the domain name you are targeting to create
Please hide sensitive information from the images before use for the client demo or documentation in other places. Consider sensitive information like,
ARN of any resources
Account No
URL of application
Application Credentials
Account Credentials
Step 1 - Subscribe to Your Avrio Product in AWS Marketplace
Click on the Subscribe button will land you in AWS CloudFormation Template
Step 2 – Enter the details in creation of Avrio Stack
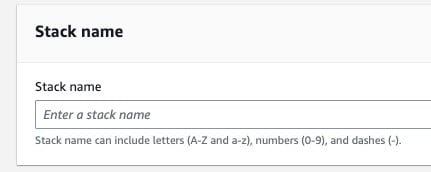
Stack Name
Provide short and descriptive CloudFormation Stack Name. This name will be an identifier of your main and nested stacks
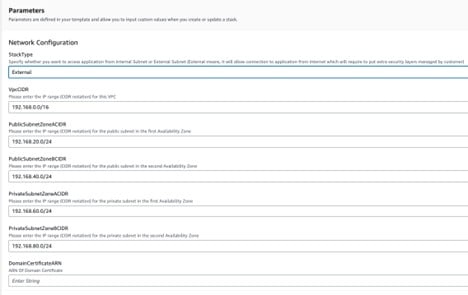
Network Configuration
Stack Type
Select the stack type you want to create. If you choose External then main load balancer will be exposed to internet on public subnets and if you choose Internal then main load balancer will be deployed in internal-mode on private subnets.
VpcCIDR
CIDR for the VPC
PublicSubnetZoneACIDR
CIDR for public subnet zone A
PublicSubnetZoneBCIDR
CIDR for public subnet zone B
PrivateSubnetZoneACIDR
CIDR for private subnet zone A
PrivateSubnetZoneBCIDR
CIDR for private subnet zone B
DomainCertificateARN
ARN of the certificate to bind it with ALB. This certificate should cover the domain name which you are going to provide for the application access.
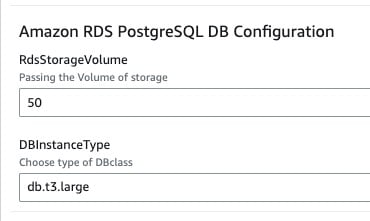
Amazon RDS PostgreSQL DB Configuration
RdsStorageVolume
Provide the size of storage according to forecasting of application usage
DBInstanceType
Provide the type of instance type to use in DB according to forecasting the load on application DB
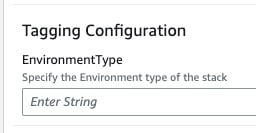
Tagging Configuration
EnvironmentType
Provide short name of your environment without space and special characters i.e. dev,prod,stage,testing,demo, etc.
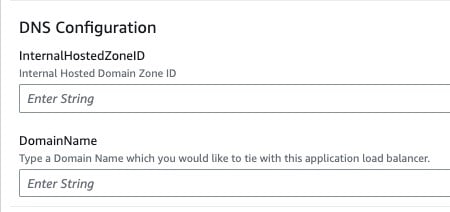
DNS Configuration
InternalHostedZoneID
Provide ID of internal hosted zone created in R53. Internal records will be created here to allow application to access services internally.
DomainName
Provide name of application domain which you want to use to access the application in browser i.e. myapplicaiton.mydomain.com
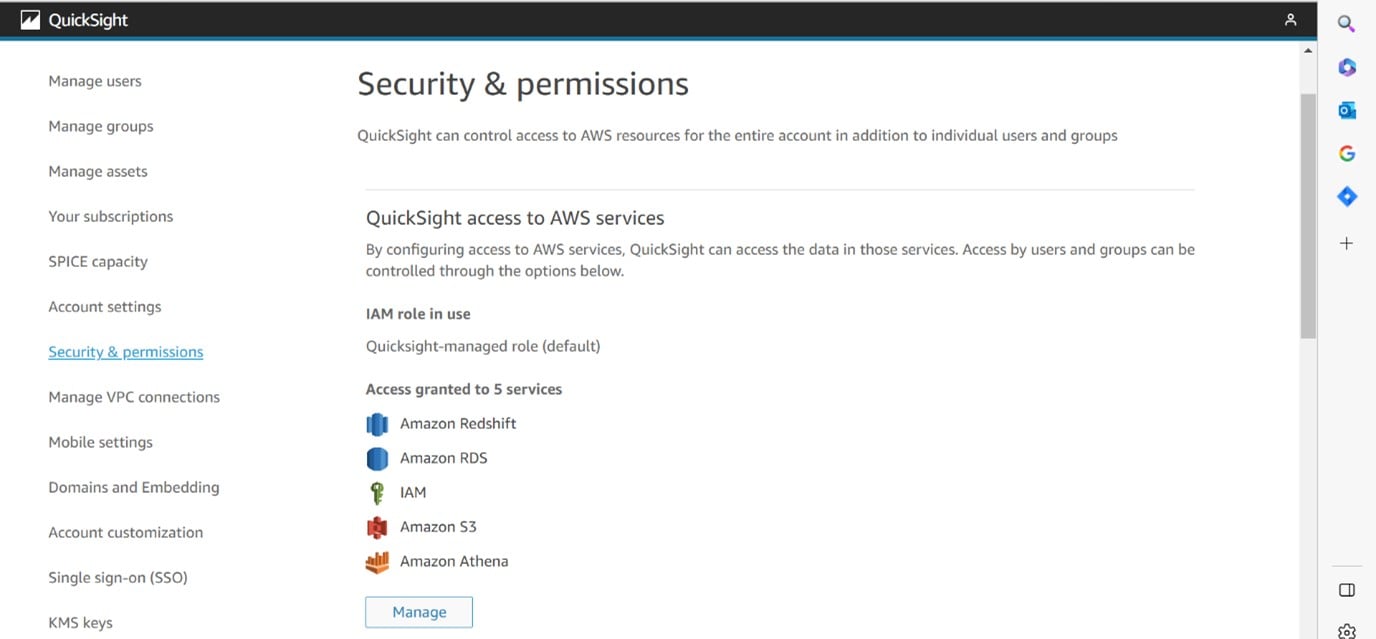
QuickSight Configuration
QuickSightRegion
Select the region where QuickSight is configured in your AWS account.

Select the Security & Permission in QuickSight configured in your AWS account for utilizing your data products of Avrio
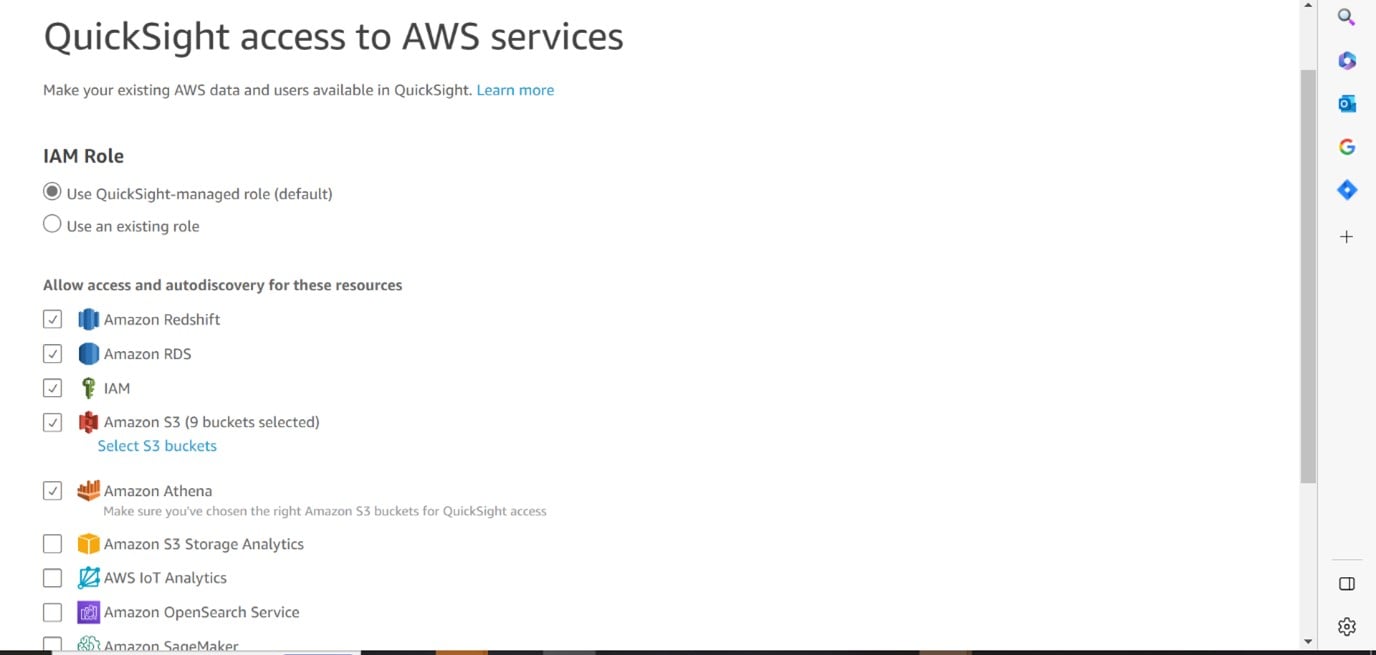
Select the default IAM role and resources which it is required to access.
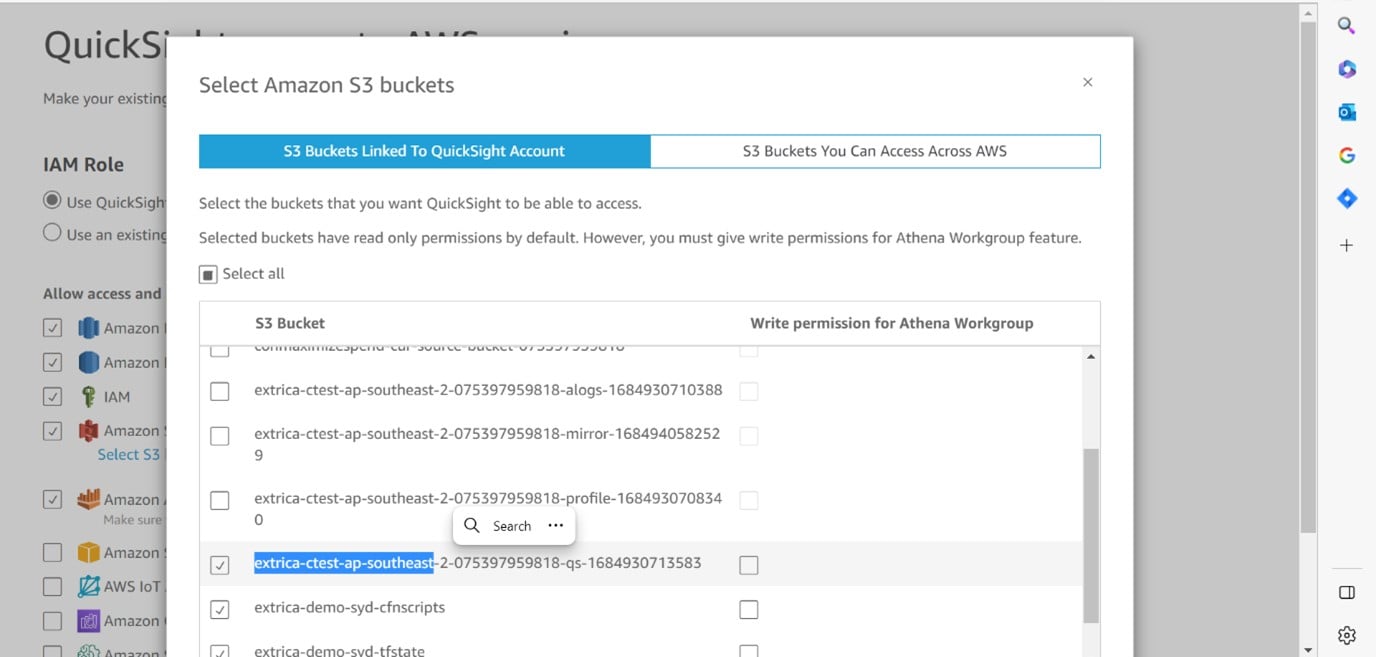
Select the buckets which QuickSight has to access.
Step 3 : Verify the Resources Deployed/Created
Please refer to the below platform architecture and verify the resources created which are listed.
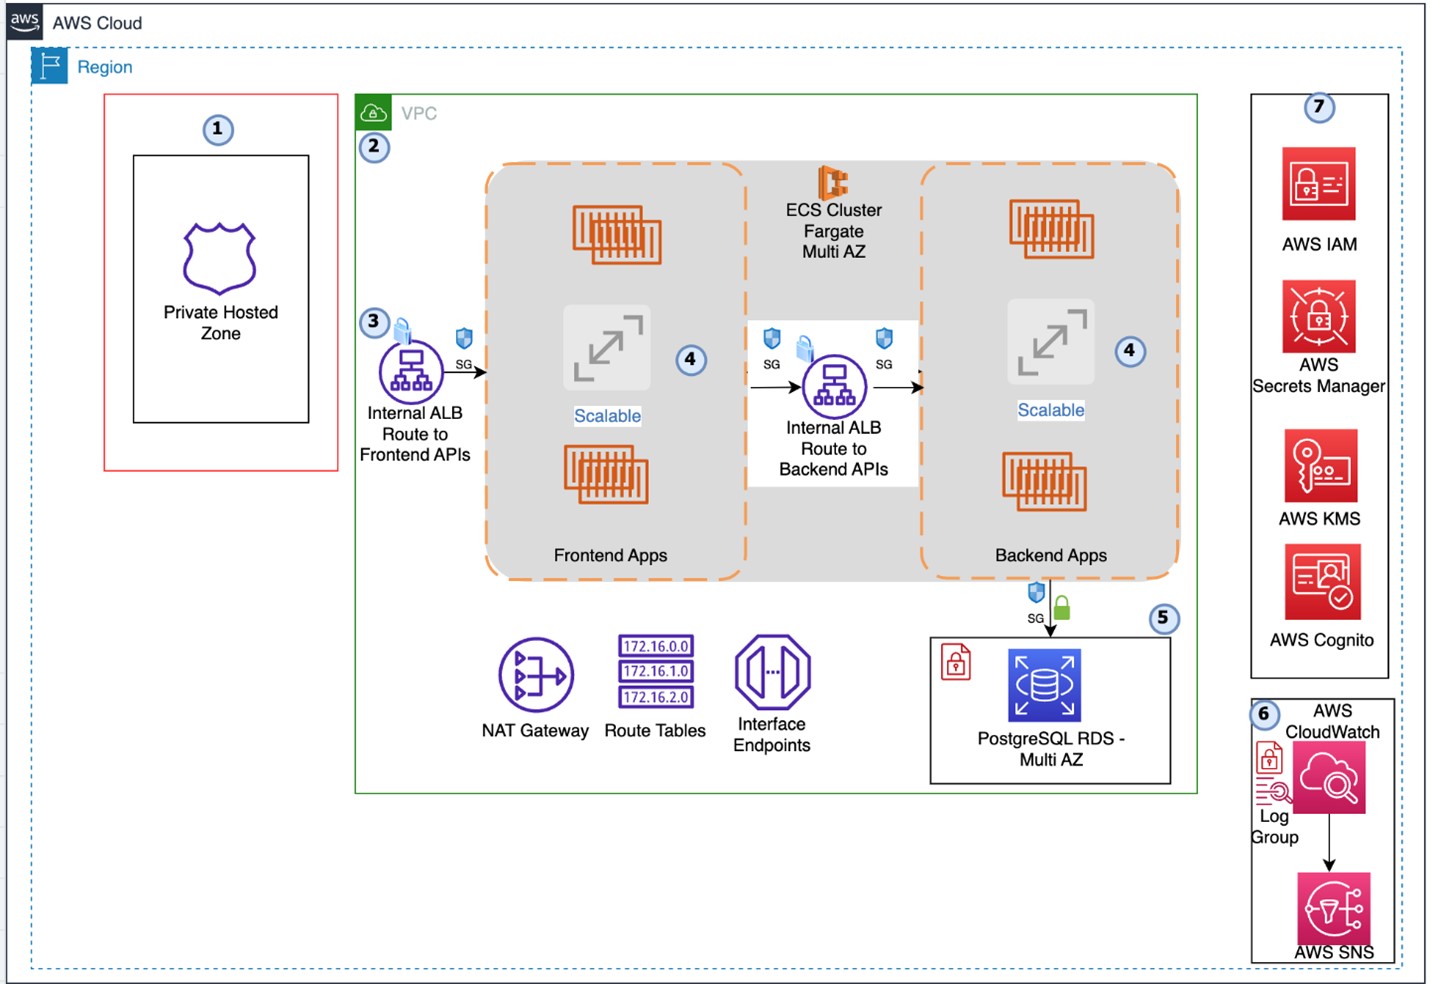
A new VPC with 2 public and 2 private subnets
Internet Gateway and 1 NAT Gateway and route tables associated with public and private subnets
1 Public IP attached with NAT Gateway
DNS entries in private hosted zone. 1 for RDS, 1 for internal ALB and 1 for External/Internal main ALB
RDS instance with Multi AZ configuration, encryption at rest using CMK generated by CFT
CloudWatch log group for each service deployed in ECS. Total 8 services will be deployed.
ECS cluster with services and task definitions, all services will be deployed in private subnets
Secrets in secret manager to be used by application
VPC Endpoints for S3, Secrets Manager, Athena, Glue and CloudWatch
2 ALBs will be deployed as a part of CFT deployment. 1 is Main ALB which needs to be pointed to external DNS to access application in browser and another ALB is for internal service communication.
AWS Cognito user pool will be created as a part of application deployment
SNS Subscriptions will be created as a part of application deployment
S3 buckets will be created as a part of application deployment
Several lambda functions will be created to support application deployment
IAM role will be created to be associated with application deployment to support Lambda functions
Step 4 : Create a Domain name for the Application
Create DNS record for the main load balancer which you will access from browser with the associated domain name.
Find the stack -
-ECSClusterStack- Go to Resources tab
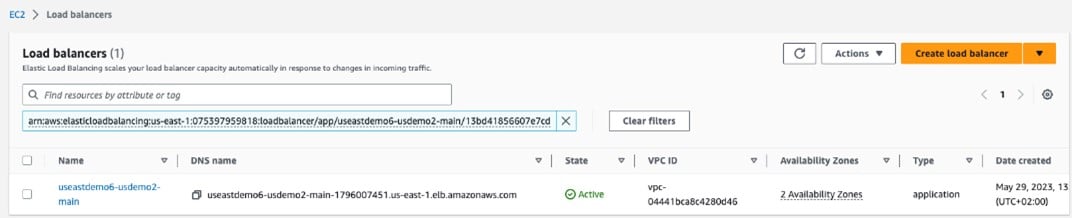
Find resource called - MainLoadBalancer

Click on the resource ARN and it will open new tab/page which will redirect you to the Load Balancer resource
Copy the DNS name from the Load Balancer resource
Create DNS record same as you provided in DomainName block while creating the stack. It should be Alias (A) record if you are using the same account for Route53 pointing to Application Load Balancer in region where stack is deployed or it will be CNAME record pointing to the DNS Name of the Main ALB which is created in stack if you are using other account or any other DNS hosting provider i.e. GoDaddy
Step 5 : Launch the Application
Once done, you can access the URL after the DNS propagation.
For example: https://myapplication.mydomain.com
You can find the Admin credentials in the secrets manager of the same account where stack has been deployed.
It will look like this. Follow naming convention.
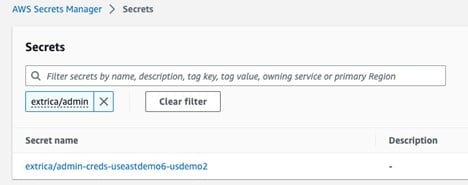
Open it and click on Retrieve Secret Value

It will show the admin credentials which you can use to login into the application. It is mandatory to change the credential after first login.
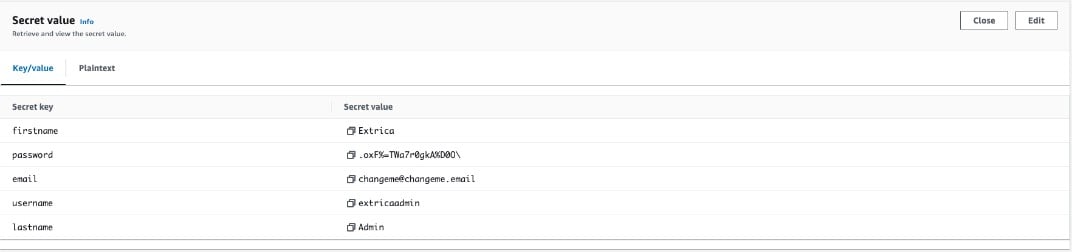
After retrieval of Username and Password, Launch the Avrio Application with the generated URL
For example: https://myapplication.mydomain.com
Successful Login will land you the main admin screen of the application.
Further Steps
Once you are all set to start building your data mesh solution on Avrio, we recommend that you check out all the available information:
Add Different User Personas
Add Data Sources


